WiKID Systems recently partnered with Atricore, the makers of JOSSO an enterprise-class SSO/SAML application. Both two-factor authentication and single sign-on have historically been expensive and complex affairs. Atricore and WiKID have both been addressing these issues by releasing easy-to-use, open-source software. These efforts merged when Atricore added native support for the WiKID Strong Authentication to their product JOSSO. In this tutorial you will see how easy it is to add two-factor authentication to JOSSO, creating a secure, easy-to-use solution for organizations needing SSO. JOSSO supports a wide variety of services including Tomcat, jBoss, Apache, IIS, Liferay, Weblogic, and Alfresco as well as cloud services such as Google Apps, Salesforce and SugarCRM. WiKID for its part supports Radius, LDAP and TACACS+ in addition to having an API. WiKID Software tokens run on Linux, Mac, Windows, iPhone, Android, J2ME and others.
Configuring JOSSO via the Atricore Console
First, you need to download JOSSO, unzip it and then start the server (run #josso_home/bin/atricore). The rest is all done via the Atricore console.
I highly recommend that you watch the Atricore Configuration video. Then, I recommend you come back here and use the steps I have here to create your 2-factor authentication SSO demo appliance. I also recommend that you start with a new empty appliance rather than using the wizard, you will learn more and it is cleaner, in my opinion.
Configuring the JOSSO Appliance
This is what the final product will look like
: 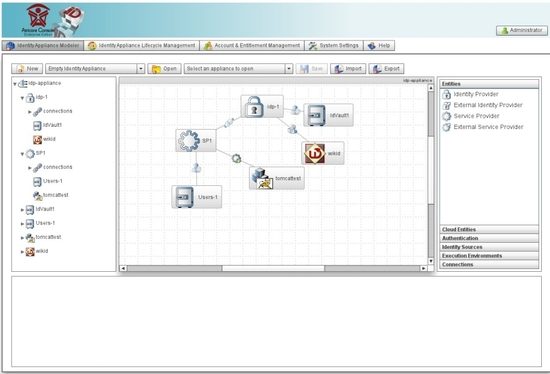
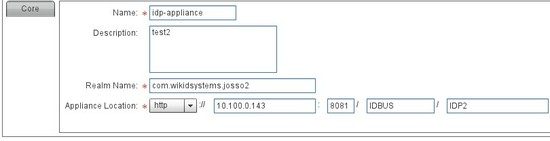
To start, in the Appliance Modeler screen, with the drop down listing "Empty Identity Appliance, click the New button. Here are the detail for mine:
Note that I am using the routable IP address and the default JOSSO port of 8081.
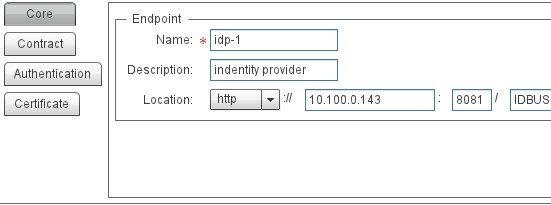
Next, highlight the Identity Provider icon on the right hand palette and click on the Diagram Canvas. A new Identity Provider icon should appear on the appliance model. Here are the detail for my identity provider:
Again, note that I am again using port 8081.
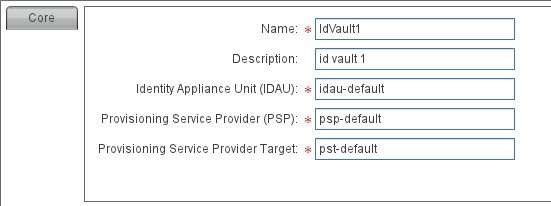
Next, we need to add a place to store the users. You might already have a database or LDAP store, but for this test, I just used a JOSSO Identity Store. On the palette, open the Identity Sources and select the Identity Vault.
Now we need to connect these. Under the Connections panel of the palette, select Identity Lookup. Then drag the mouse from your Identity Provider to the Identity Vault.
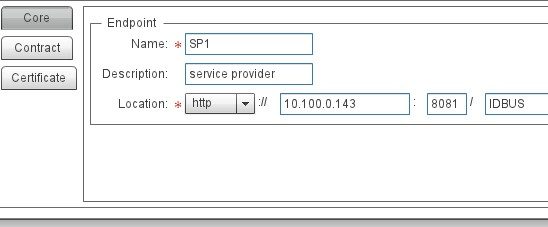
Click on the Entities panel again and select Service Provider.
Again, we have used the defaults only changing the IP address and the port to 8081
Connect the Service Provider to the Identity Provider with a Federated Connection.
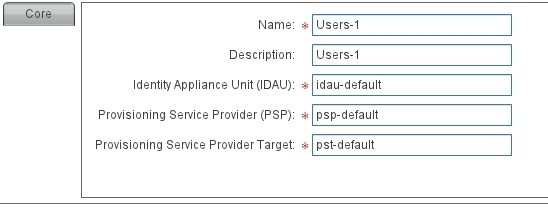
The Service provider will need a User Store. From Identity Soruces in the Palette select Identity Vault and put it just below the Service Provider. Again, I used the defaults, just giving it a name:
Connect it with an Identity Lookup connection to the Service Provider.
Adding a Partner Application
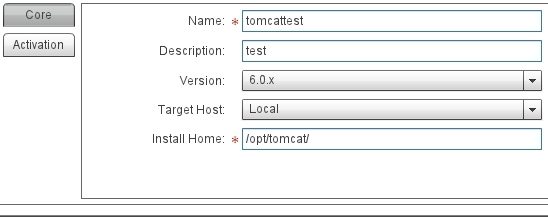
Atricore recommends using the Tomcat Execution Environment for simple proof-of-concepts like this. I downloaded tomcat and installed it /opt/tomcat on the JOSSO server. JOSSO is smart enough to install the sample app for you. Click the Tomcat option in the Execution Environments on the palette and position it below the Service Provider.
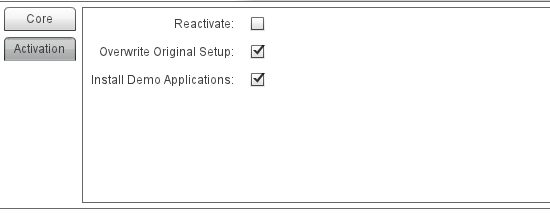
You will also need to click on the Activation button on the Properties pane to install the Demo Application. Also, if you make changes you need to select Reactivate to push the changes. Then you need to restart Tomcat.
Connect the Tomcat Instance to the Service Provider with an Activation Connection:
Please note that the Connector is using port 8080! This is tomcat's default port. If you change the port here, you must also change it in tomcat. JOSSO will install the sample application in $TOMCAT_HOME/webapps/partnerapp and it will create the partnerapp directory.
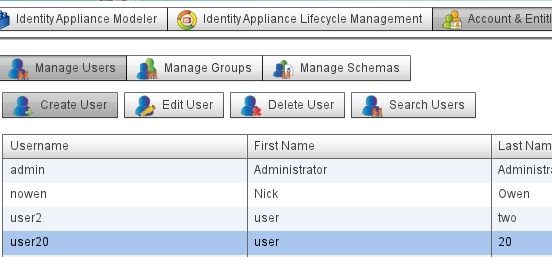
Before we add in the WiKID Two-factor authentication, we should test to see if everything works without two-factor authentication. To do that, we need to add some users into the ID vault. (And we need the users anyway. WiKID only does the authentication, not the authorization.) Click on the Account and Entitlements tab and then on Create User. A dialog box will prompt you to add a user:
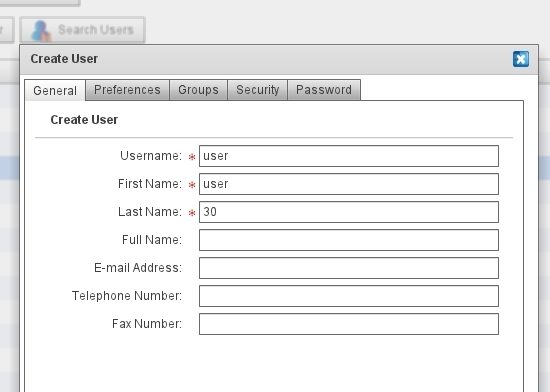
You will see the user listed:
Testing the login
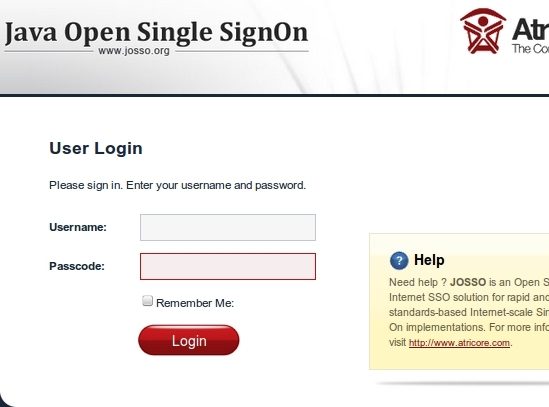
Start tomcat if you haven't and browse to http://yourserver/partnerapp. You should get this page:
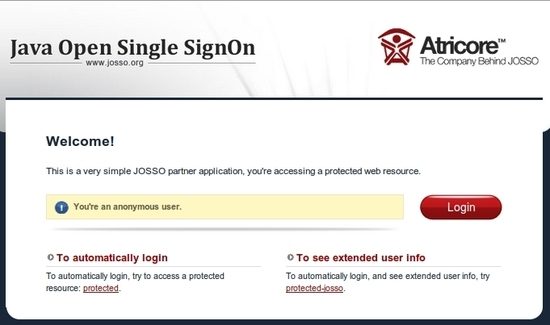
Click the Login button and login with the username and password you created in JOSSO.
Adding two-factor authentication to JOSSO
Now that we know the partner app works, we can add two-factor authentication into the mix. However, before we add WiKID into JOSSO, we must first add JOSSO to WiKID. On the WiKIDAdmin web UI, click on the Network Clients tab.
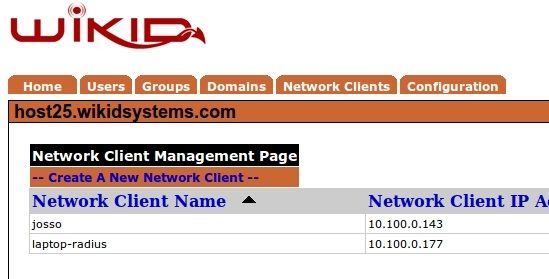
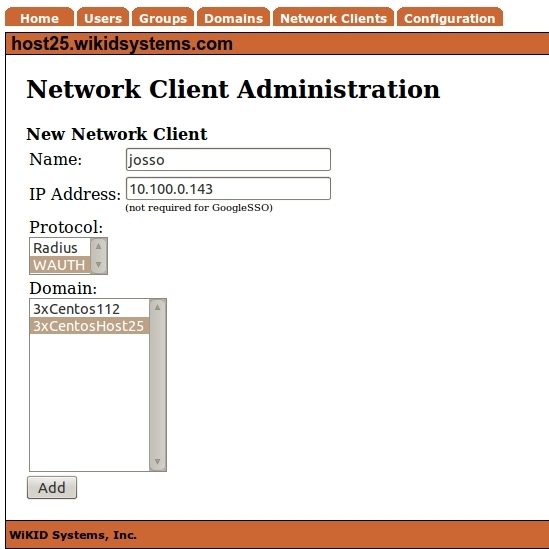
Click on Create A New Network Client. Give it a name and specify the IP address. Select WAUTH for the protocol and choose the WiKID Domain you intend to use. Then click Add.
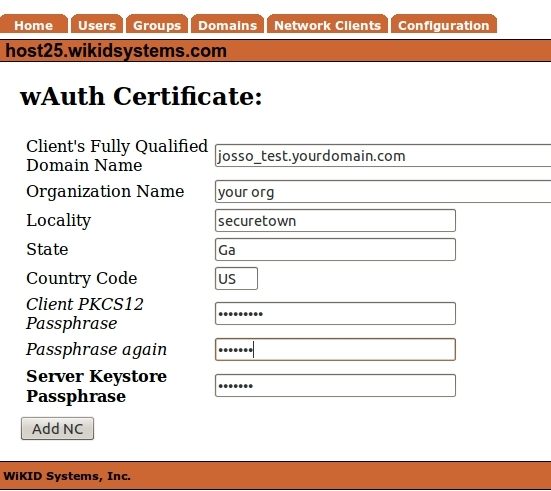
You will be prompted to create a certificate for you JOSSO server. This P12 file will identify the network client to the WiKID server and will encrypt the communications between WiKID and JOSSO (meaning this can be done over the Internet). Enter the appropriate information and hit Add NC.
Download the created cert from the main Network Client page to your local PC. You will upload this to JOSSO. You will also have to download the CACertStore from /opt/WiKID/private.
On the palette, select Authentication and hightlight WiKID. Add it on the canvas just below the Identity Provider.
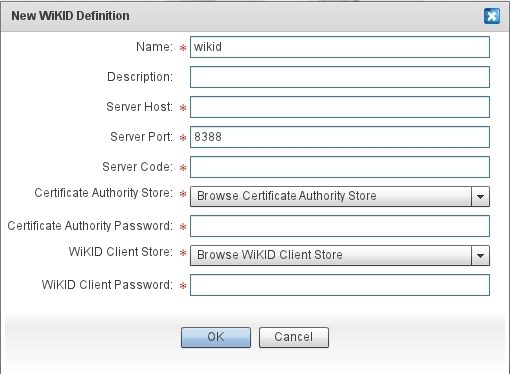
Give it a descriptive name, enter the IP address or fully qualified domain name and enter the 12 digit Domain Identifier for the Server Code. The Certificate Authority Store is the CACertStore file we downloaded earlier from /opt/WiKID/private on the WiKID server. Browse to it and upload it. The passphrase for this is the Java default: "changeit". Enter this as the Certificate Authority Password. The WiKID Client Store is the network client P12 file downloaded earlier. Choose it and then enter the passphrase for that file. Press OK.
That's all you need to do to integrate WiKID with JOSSO!
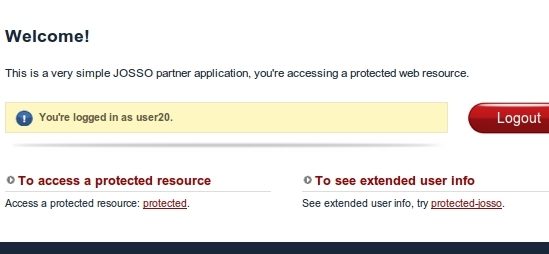
Testing the login
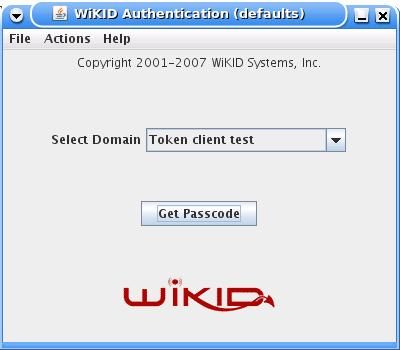
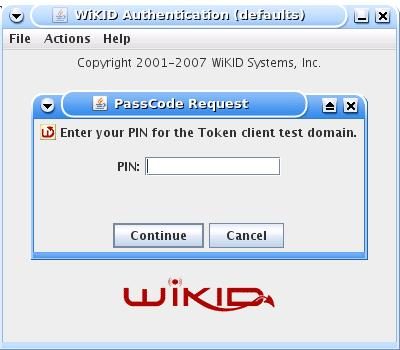
Now let's test the login again, this time with WIKID. Start the WiKID token, enter your PIN and request a passcode.
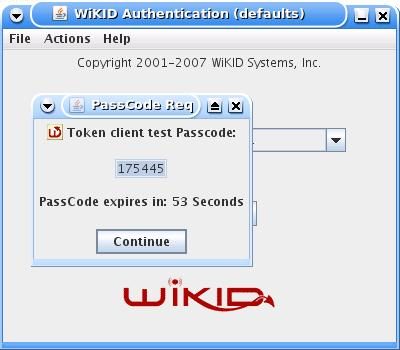
The OTP will automatically be copied to the clipboard. Enter your username and paste the OTP into the password box.
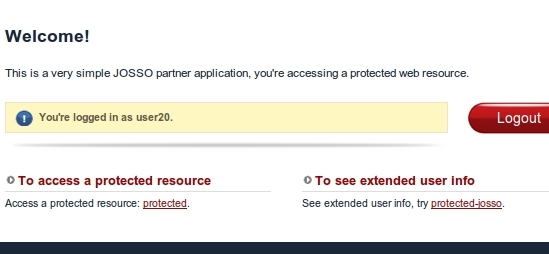
Once again, you should be successfully authenticated, this time with two-factor authentication.
Conclusion
Increasingly, companies are moving services to cloud providers such as Google Apps, Salesforce and SugarCRM. These services all require authentication, placing strain on users to remember strong unique passwords for each service. Clearly this is a key failure point in the security of cloud services. Single sign-on can reduce the number of credentials but creates its own "keys to the kingdom" risk. By combining two-factor authentication with SSO, everybody wins. The users get a better experience and the enterprise gets more security. In addition, WiKID's support for RADIUS means that you can also protect your VPN access.