This tutorial shows how to add two-factor authentication to the Checkpoint Security Gateway's IP-Sec VPN. We are running Gaia R77. The first part shows how to add a RADIUS host to the Checkpoint using the SmartConsole (which is exactly the same as for Mobile Access but repeated here for ease). Note that if you want to integrate your directory for authorization in this process simply use the IP address of your RADIUS server - NPS or Freeradius for example - instead of your WiKID server. Don't have a WiKID server for two-factor authentication? Get one! First five users are free.
Configure the Checkpoint Security Gateway
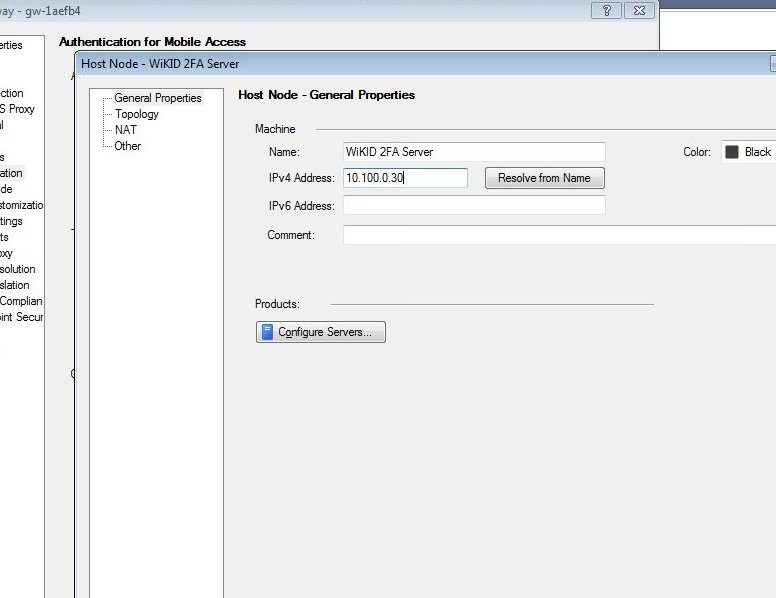
To configure your Checkpoint, log in to the SmartDashboard. Click on the main management button and select Manage > Network Objects > New > Node > Host.
Enter the name and IP address of your WiKID Strong Authentication server on the General Properties page. Click OK to save the new host, and then click the Close button in the Network Objects window.
Head back to the main management button and select Manage > Servers and OPSEC Applications > New > RADIUS.
On the General tab, give the server a name such as WiKID. Select the host you created earlier. Be sure to select New-RADIUS as the protocol. This option uses the "new" port of 1812. It was updated in 2000.
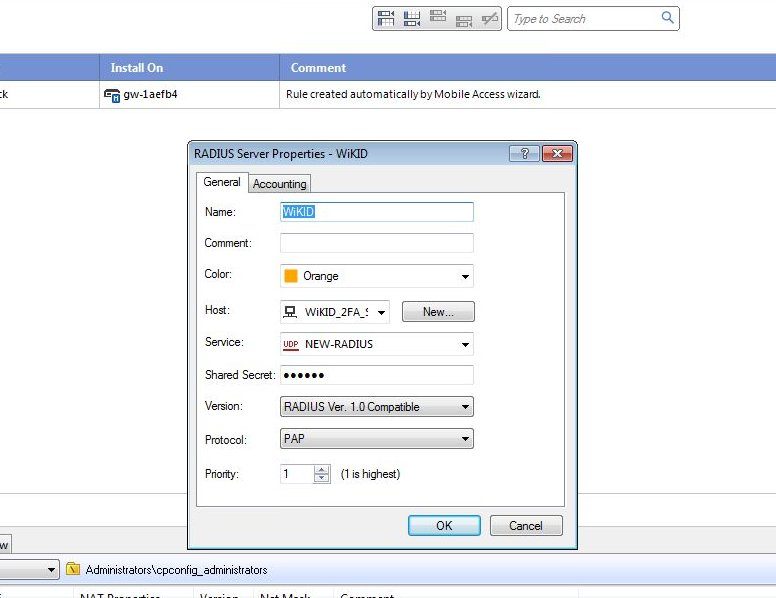
Click OK and Close.
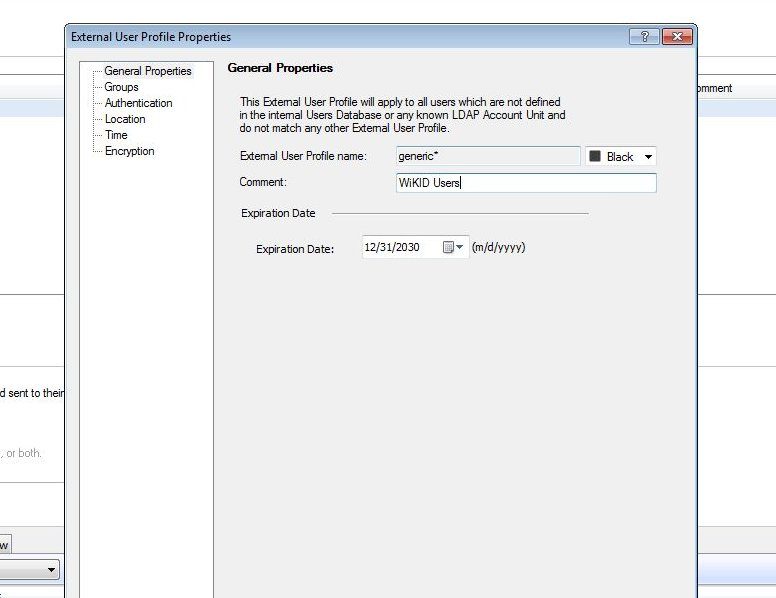
Now, we need to create an External User profile. On the main menu, select Manage > Users and Administrators > New > External User Profile > Match all users.

On General Properties tab, add a descriptive comment.
Click on the Authentication page and choose Radius as the Authentication Scheme and Select the WiKID or NPS/Freeradius host you created earlier.

Next, click on the Mobile Access tab and the Policy page. Right click on the Policy and select Edit. Move the generic* from Available Members to Selected Members.

Configuring the IPSec VPN for RADIUS
Now to configure the Checkpoint IPSec -VPN. Click on the IPSec VPN tab and click on Gateways in the left window.

Right click on your Gateway and select Edit. Click on VPN Clients and then Authentication. Click on RADIUS and select the WIKID server you added as RADIUS server above. Note that if you are using NPS or another RADIUS server you would enter it here.

Click OK. And then the Install Policy button.

Configuring the WiKID Server
Next we can quickly add the Checkpoint to the WiKID server. On the WiKIDAdmin UI, click on the Network Client tab then Create a New Network Client. Give it a name and enter the IP address of the Checkpoint Gaia Security Gateway (or the NPS or Freeradius server if you are using them).

On the next page, enter the Shared Secret you entered on the Checkpoint Secure Gateway for the RADIUS host. And click Add NC.

Now on the WiKID server terminal, restart WiKID using 'wikidctl restart'. That will cache the RADIUS information and on our Virtual Appliance, open the firewall port.
That's it. Now you can test the login with an OTP from a WiKID Software token. Note that when you setup the Check Point Endpoint Security VPN client, you choose Username and password as the authentication method. Users will enter their username and the OTP. If you are using NPS to integrate Active Directory, NPS will only need the AD username for authorization. Be sure that the username in WiKID matches their AD username. You might use the ADRegister scripts to automate this process.